


If you tuned into our IG Live with Tatiana of Zuahaza for Earth Month, you may know that we’re getting very into natural dyes over here! Learning about Zuahaza’s process of dyeing with organic cotton opened our eyes to the many ways you can go about dyeing your own fabrics naturally. I’ve had natural dye on my DIY bucket list for years, and the DIY avocado dye Tatiana shared a while back got me even more excited to give this a go. For this project, she shared her recipe for DIY onion skin dye, which is a way to dye cotton, silk, and other natural fabrics a range of yellow, mustard, and orange hues. I followed her lead with my own silk scarves and cotton yarn, and we all got very different results!
Keep reading for the DIY from Zuahaza, as well as photos of my own results of the tutorial.
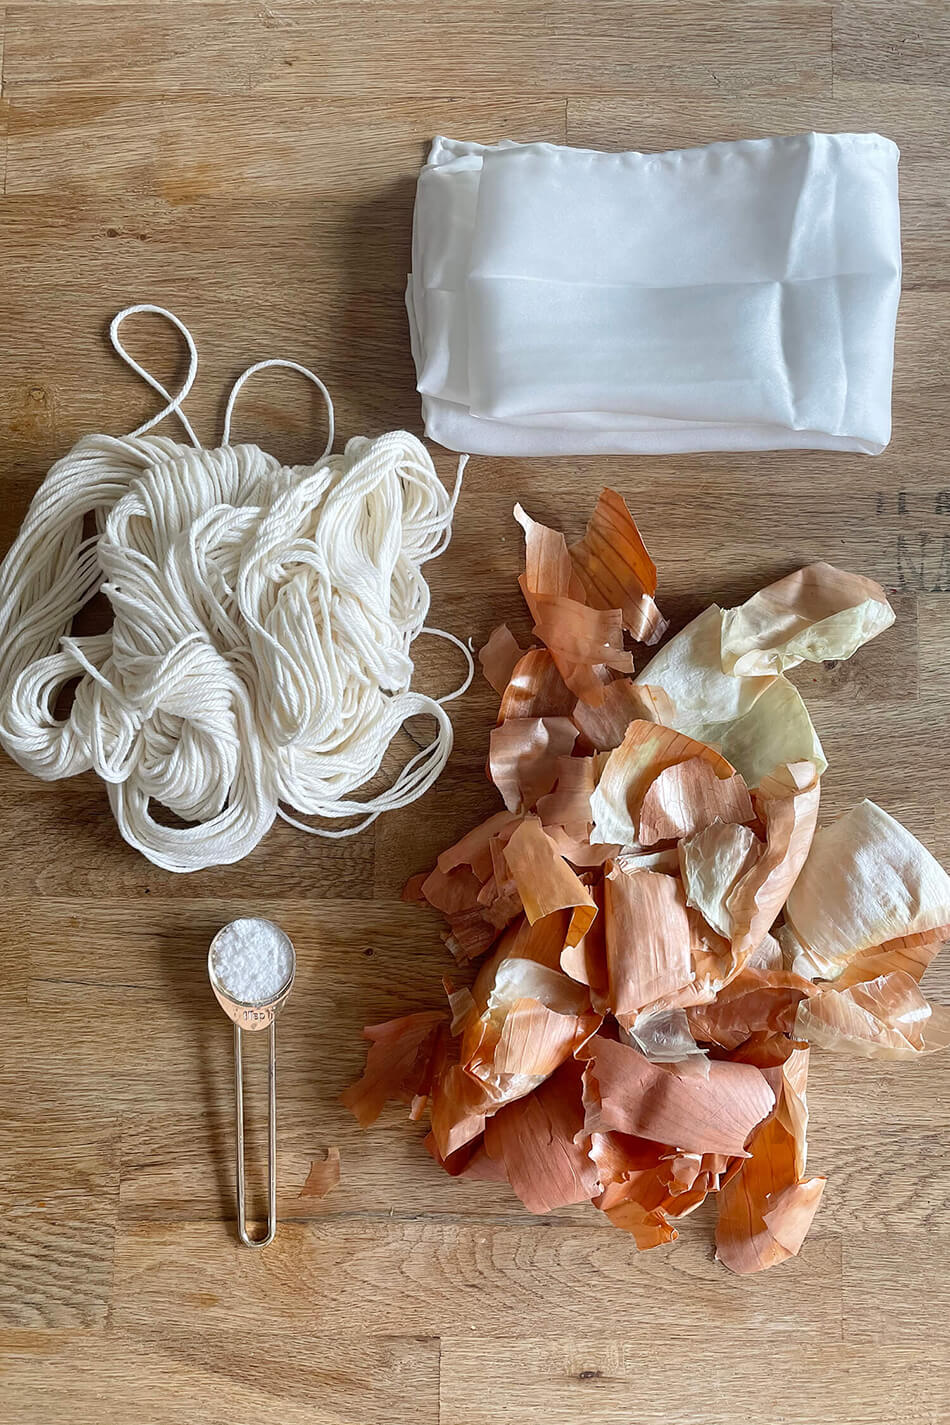
diy onion skin dye – what you’ll need
ONION SKINS
Store your onion skins in a dry place for at least a week. If you see mold collecting, you can move your onion skins to your fridge. Try to get them as dry as possible before you freeze them. The number of onion skins will vary, but as a rule-of-thumb, collect as much as your fabric weighs. A 1:1 ratio is always a good place to start.
Note: Onion skins are extremely lightweight when dried, so you might need to collect more than what you think.
Tip: If you can’t collect enough onion skins from your kitchen, head to your local farmers’ market and ask them for a few. They generally peel onions and throw away the skins, anyway!
FABRIC OF CHOICE
If you are planning to store 200g of onion skins, then you’ll need your yarn skein or your cotton t-shirt to weigh at least 200g. We encourage exact measurements.
ALUM POWDER OR AN ALUMINUM STONE
Some great websites sell natural dyeing materials. You can order alum powder from Dharma Trading here. If you are using powder, you will need only 1 tablespoon of powder per 100g of fiber. If you are in Colombia or in other countries outside the US and Europe, I recommend buying an aluminum stone, which you can easily find in pharmacies or online. You just need one or two for this project.
Note: I (Angela) used alum powder, and Tatiana used a stone for hers.
A LARGE STAINING STEEL POT
HEAT-RESISTANT GLOVES
A WOODEN SPOON
I had collected these onion skins in my freezer for many moons before the tutorial. It was a pretty big pile!
before dyeing, mordant your fibers
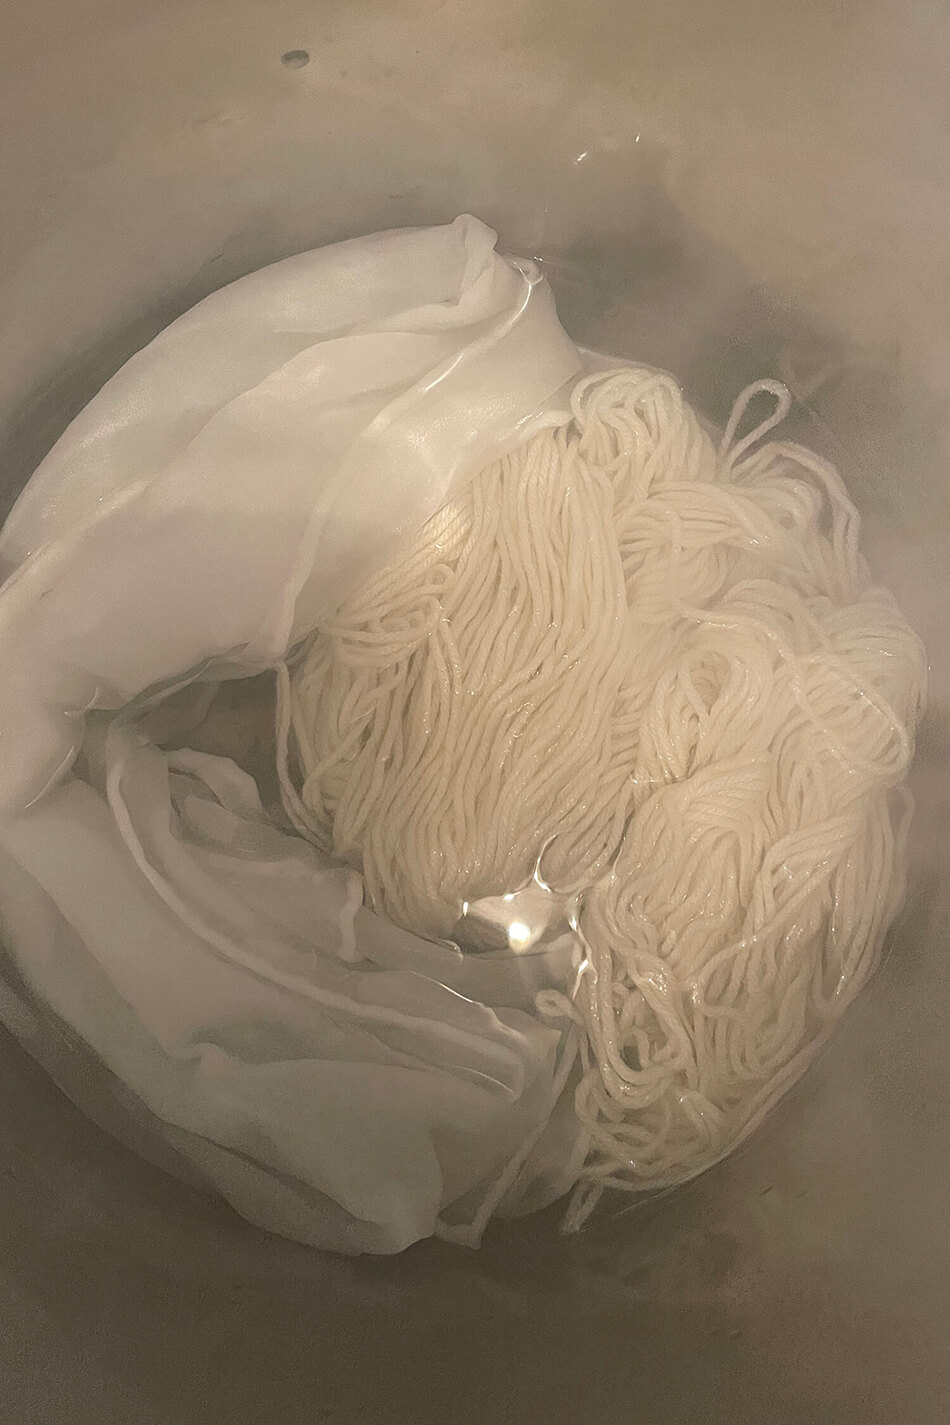
First, we are going to prepare your fibers to soak up and adhere to the color as much as possible. I prefer to mordant all my fibers with aluminum before dyeing because it makes the colors stronger and even more long-lasting. It’s a simple step that helps guarantee your color won’t wash off after dyeing.
Boil enough water in a medium-size pot. Just enough to cover your fibers.
-
Introduce 1 aluminum stone or 1-2 teaspoons of aluminum powder (based on the weight of your fibers)
-
Mix thoroughly until dissolved.
-
Wet your fibers. Make sure your fibers (t-shirt or yarn skein) are fully wet before introducing them.
-
Introduce your fibers to the hot pot and simmer for 1 hour.
-
Move your fibers around every once in a while. Do not let the fibers sit. This will avoid having uneven color and help you get nice even results
-
Remove and wash with cold water.
diy natural dye tutorial – how to dye onion skins
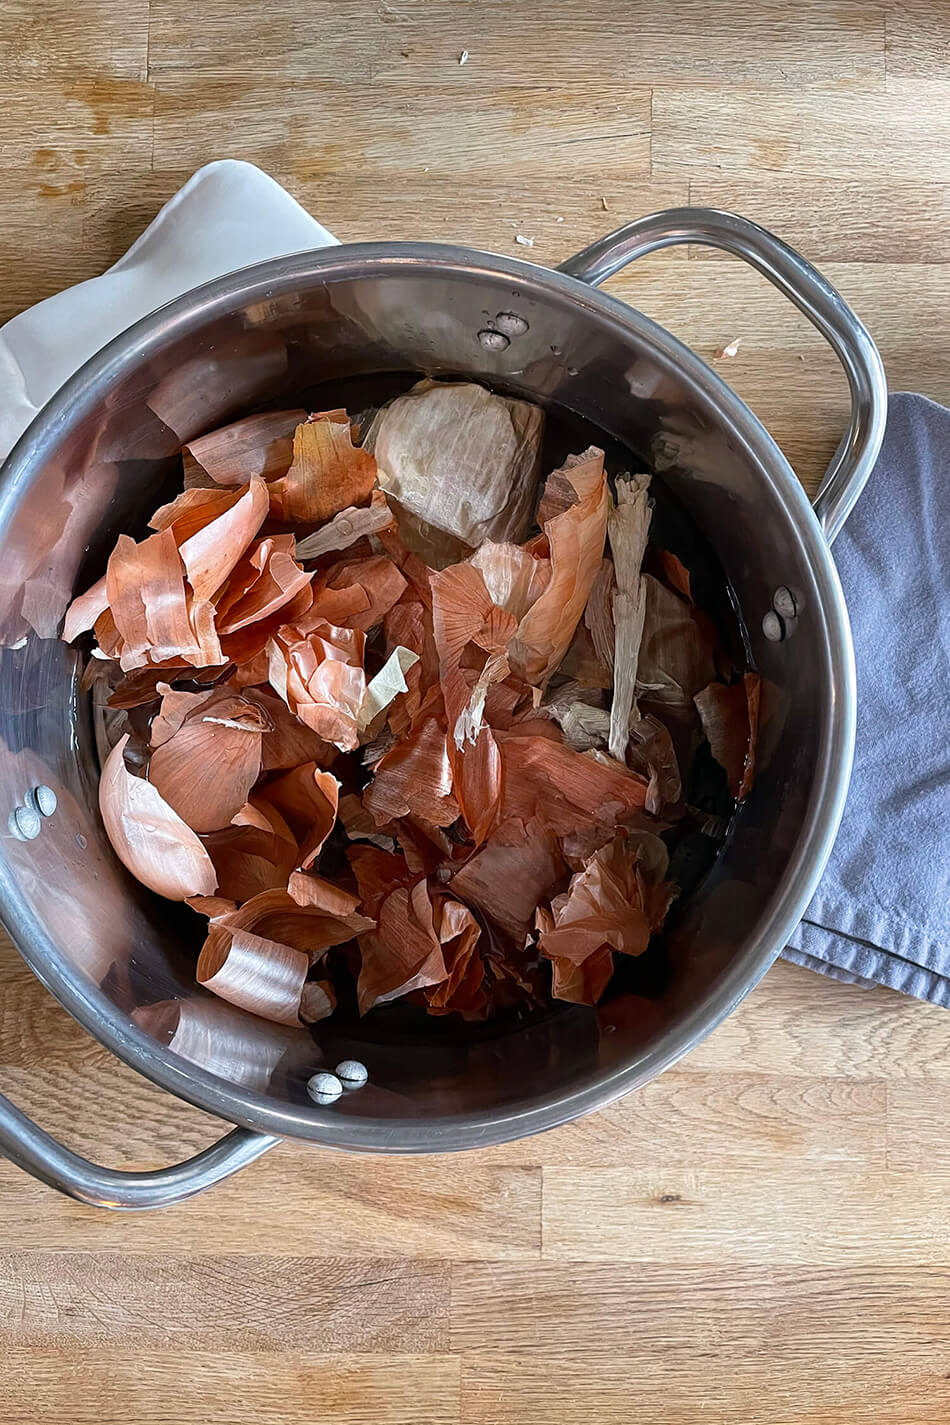
1. In a medium-size pot, bring water to a boil and then keep it at a simmering temperature. How much water you might ask? This is not as important as the exact measurement for your dyestuff and dry goods. Enough water to cover your fibers is good.
2. When the temperature is simmering, add your dry onion skins to the pot. DO NOT let the water get to a boiling temperature as this might burn the dye and you might get results that end up brown.
3. Keep at a simmering temperature (medium to low heat) for about an hour.
4. You can either filter out your onion skins in this step or keep them in the bath, is up to you.
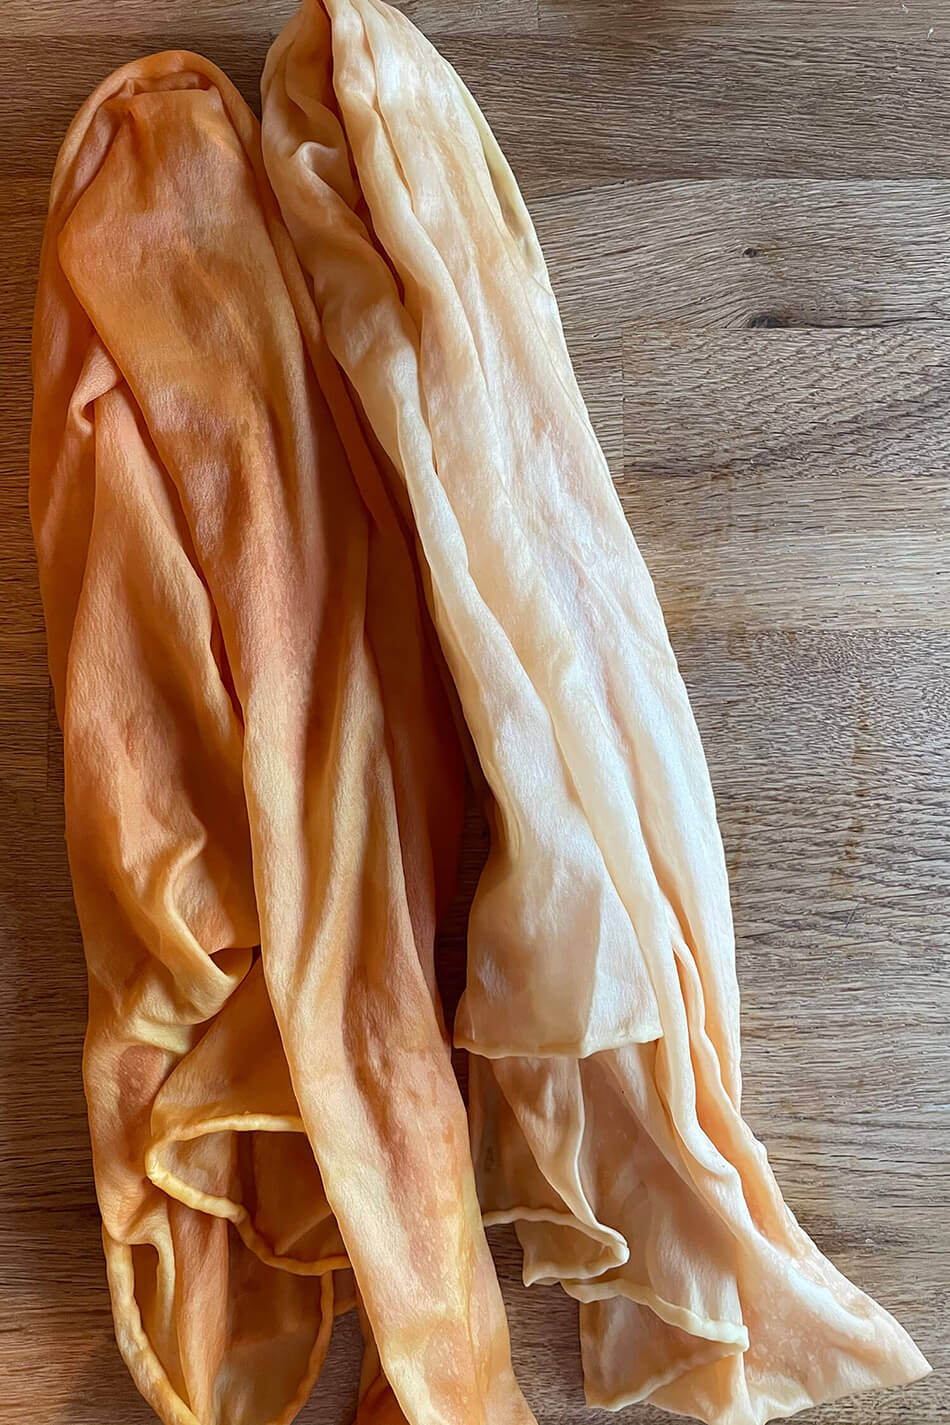
I read that some people do not mordant silk before use (it is good at keeping color naturally), but that it is possible to do so. So I used the mordant for one of the two scarves – the darker one was treated with the mordant before dyeing, and I skipped that step with the one that came out lighter. Love them both!
5. Introduce your fibers. I recommend always washing with water your yarn skein or fabric before introducing it to the dye bath. This opens up the fiber molecules to receive the dye better and avoid uneven dye spots.
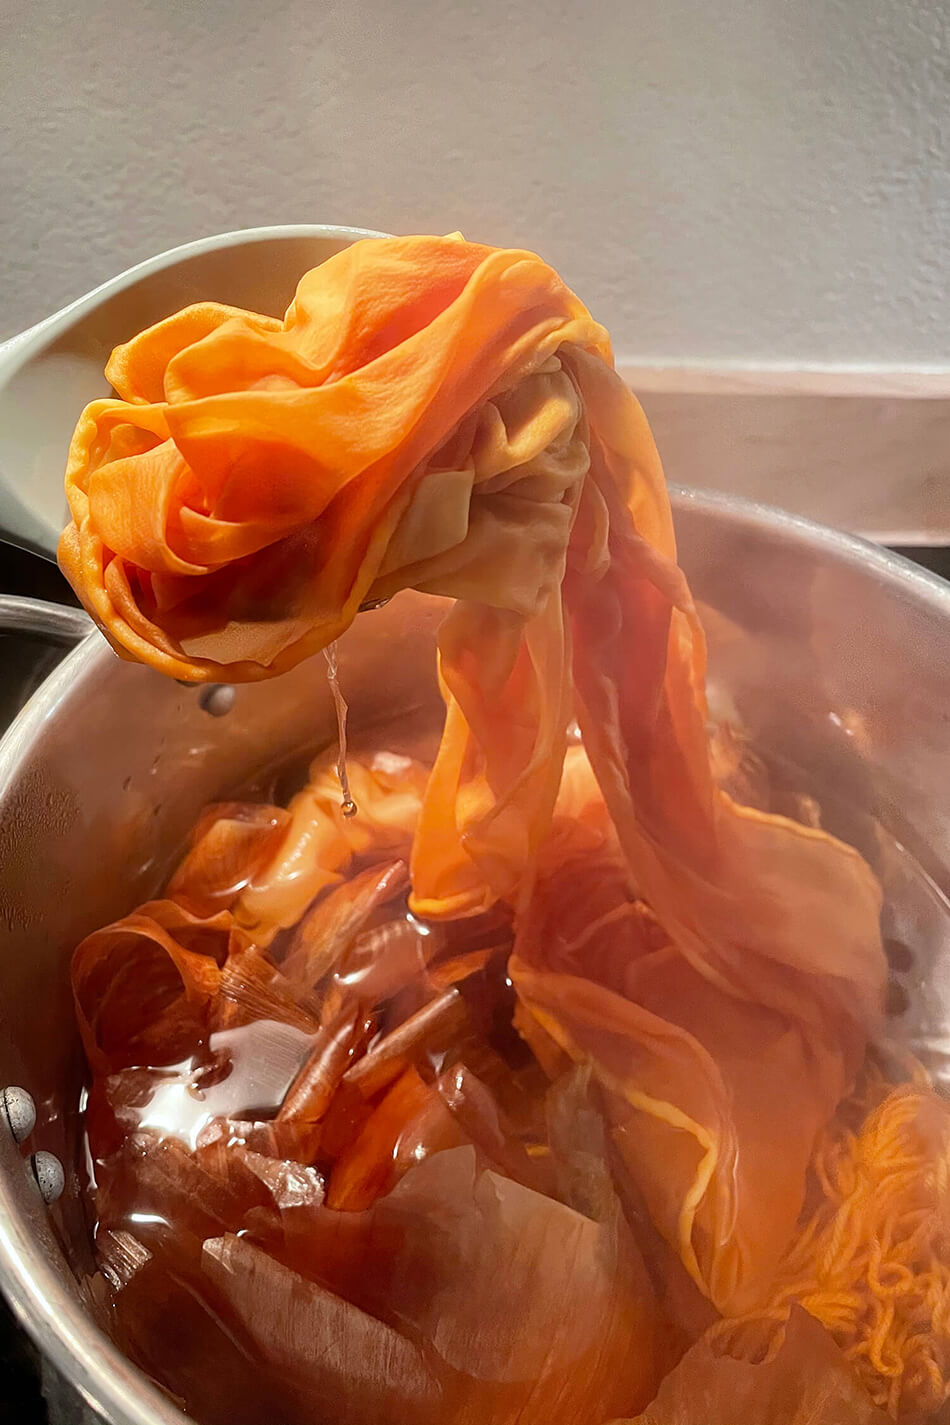
6. Move your fibers around constantly. You can use metal tongs, wooden spoons, or heat-resistant gloves to move it around the dye bath. This is crucial to getting even colors.
7. Leave your fibers between 1-2 hours in the dye bath and move around constantly.
8. Carefully use your heat-resistant gloves to take out your fibers and wash with water until water runs clear and discard your onion skins in compost or organic material waste.
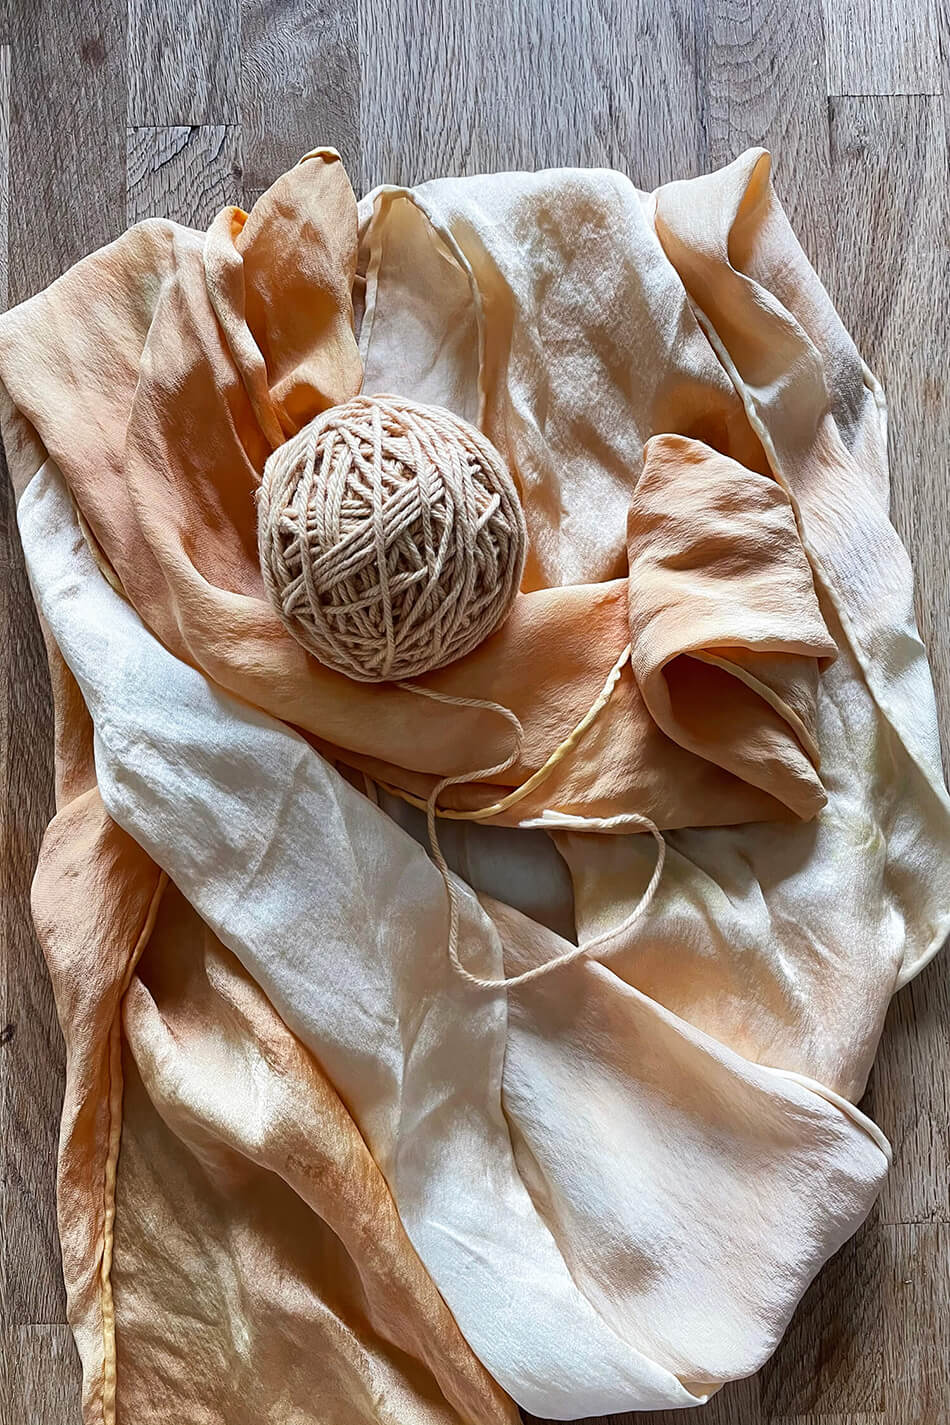
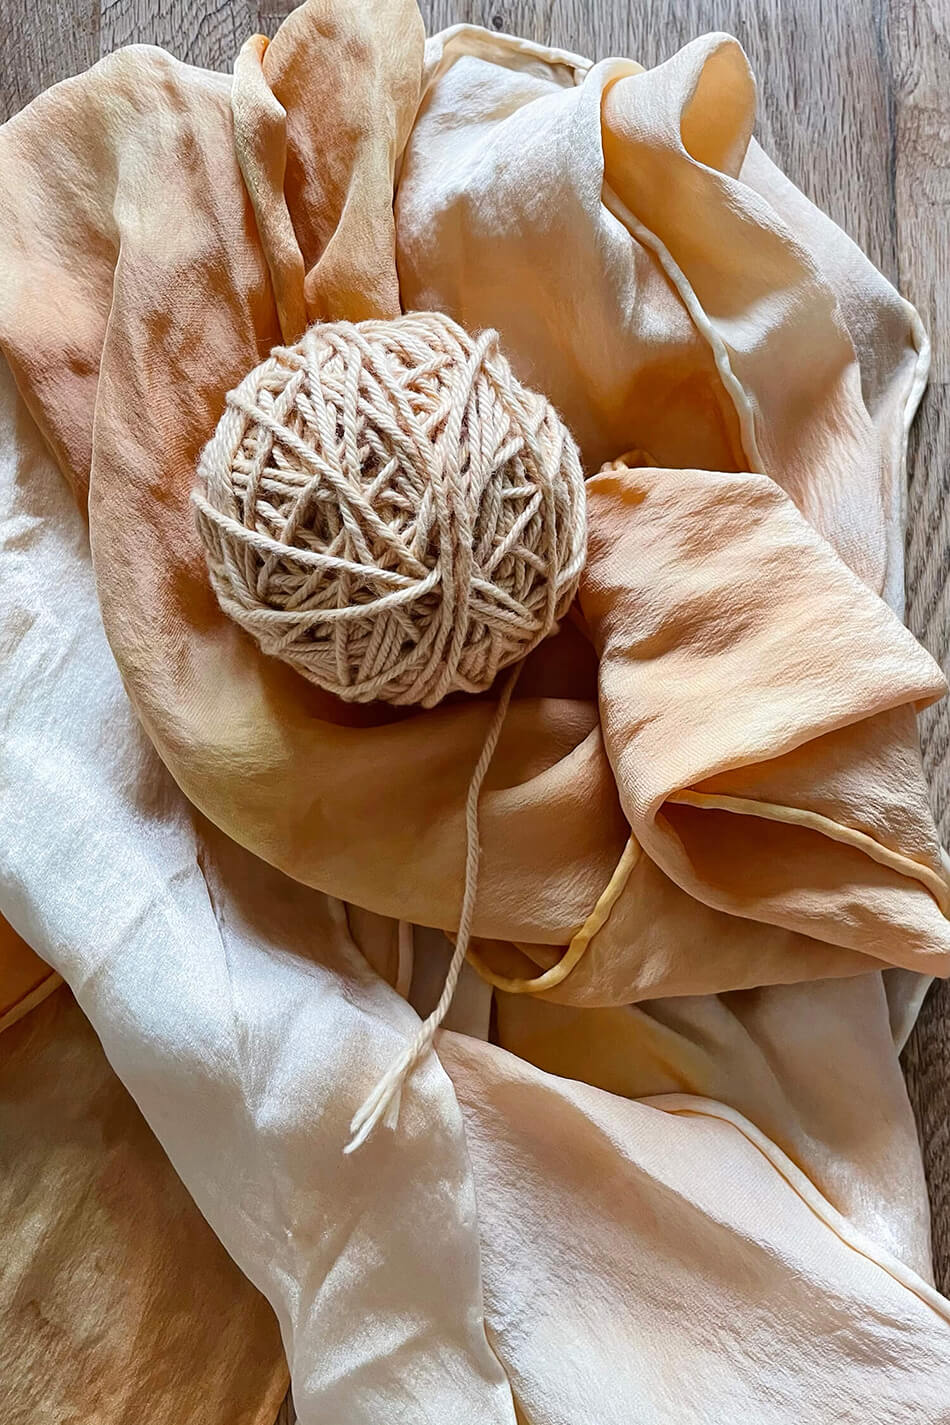
As for my cotton yarn, the onion skins produced a very light peachy-orange dye, like a faded creamsicle hue. It looks a bit more orange-y in real life, but my phone didn’t capture it perfectly.
This DIY onion dye recipe is actually the same one that Zuahaza uses to produce their own yellow hue on their textiles! Just look for the one with the Pitaya Yellow shade.
How that you’ve seen MY results, head to Zuahaza’s blog to see Tatiana’s! She dyed a towel and a t-shirt, and got a much more mustard color! She also reveals what happens when you add iron and other modifiers, as well as more tips and tricks for successful dyeing.
[…] a fun DIY at home, you can also boil down the skins into a natural dye for fabric! Depending on the kind of onion and fiber you’re using, you’ll get anything from a pale […]